Art therapy: What are the benefits?

art therapy

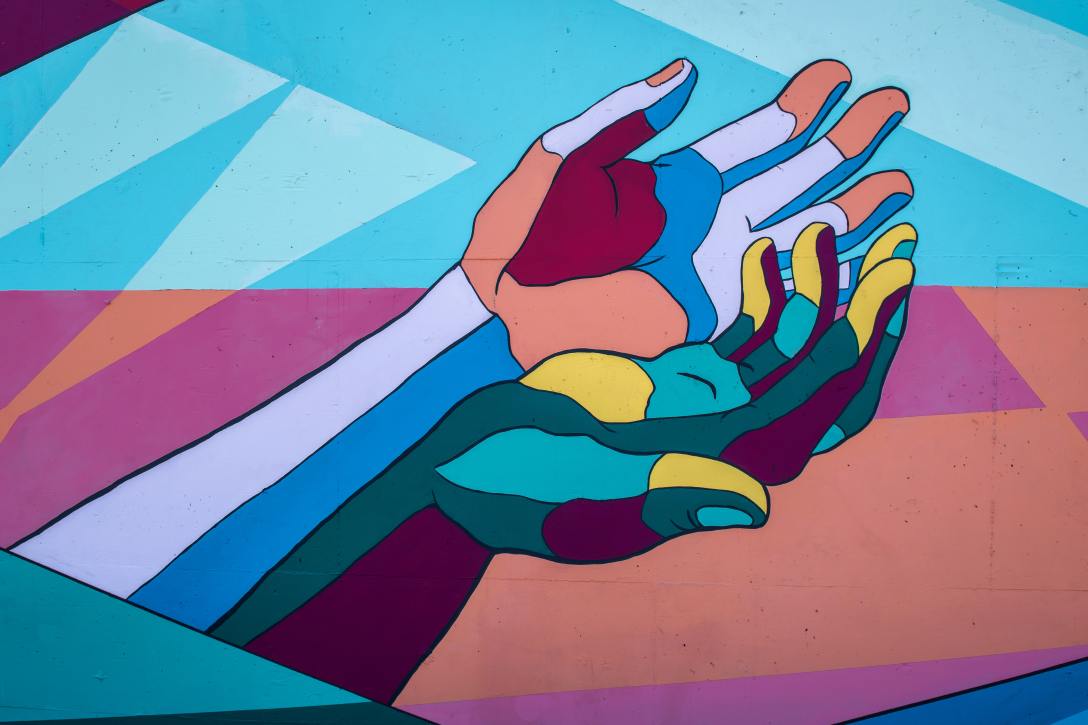
Using visual art for therapy is known as art therapy. You can try any activity like painting, doodling, journaling among others using different mediums to have a therapeutic effect on your mind.

There are professional art therapists who can help you find the art activities that suit you the best. But it is not necessary to consult one if you want to start art therapy. Find any medium that seems comfortable to you and start creating. It will take you some time to get used to the medium and the process.

The focus of art therapy is on the process and not on the final product. There are no mistakes in your work in art therapy. You can draw whatever calms you down.

The benefits of art therapy include self-discovery, an increase in self-esteem, emotional release, and stress relief. You will be able to acknowledge your feelings, feel a sense of accomplishment, let go of your emotional slack, and relieve the stress when you practice it.

Art therapy can help you release dopamine when you create. It will also help you to communicate with others through your art. Art therapy does not make you a great artist but makes you a better human being.

Digital Art: What You Need to Know

digital art

The never-ending debate that digital art is not “art” has been on the rise recently.

Just like traditional art, there are different types of digital art. There is vector art, 2D digital art, 3D digital art, pixel art, and much more. The difficulty in both art essentially depends on the type of drawing.

One major difference is the presence of the undo button in digital art, which makes clearing your mistakes in the digital medium a lot easier than the traditional medium. You can go back and forth without making your work a mess.

The flexibility of working in layers in the digital medium gives you the liberty to actively make mistakes and correct them. This freedom, however, is limited in traditional art which makes it a lot more rigid when compared to digital art.

However, the textures in traditional art are almost too hard to achieve with digital art. Also, the hand control required for digital art is much more when compared to traditional art. 

Degrading a form of art just because it looks easier is pointless. It’s always advisable to be open to experiments and suggestions before choosing mediums that work the best for you.

All you need to know about Pastels

Pastel drawings

If you like to experiment with mediums, you must try using pastels. The best advantage of painting with pastels is that they are cleaner and easier to use when compared to paint.

The different types of pastels are oil pastels, soft pastels, pan pastels, and pastel pencils.

Soft pastels are the most commonly used form of pastels. They are finely powdered pigments held together by binders. With a fragile consistency and intense colors, they are well suited for blending but not quite so for adding details.

Oil pastels, on the other hand, are pigments held together by oil. They are waxy but smooth in texture and allows a considerable amount of blending when compared to crayons. They produce bright and intense colors. They are available in several shades and can be used for paintings that closely resemble oil paintings.

Pan pastels are compacted soft pastels in a pan. They are applied to the canvas using soft tools. It reduces wastage of pigment powder.

Lastly, Pastel pencils are used to add details to your pastel paintings. Hard pastels contain more binder and less pigment and hence, are not fragile. They are easier to transport when compared to soft pastels.

Explore the world of pastels now and let your creativity run wild.

5 Basics Skills for Drawing Realistically

realism

Drawing realistically is easier said than done. But at the same time, realism is something that can bring life to your creations. There are five basic skills that you need to master drawing realism. They are:

Identify the edges: One should be able to identify and differentiate two objects when they see their reference image. For this, they have to recognize the edge of these objects.

Identify shapes and spaces: While observing an object, one should be able to differentiate between object and space. For example, in a chair, the wood forming the body of the chair is a part of its shape, and the intentional voids in its design are spaces. 

Understand proportions, perceptions: To understand proportions, use your thumb or your pencil as a ruler.  Perception occurs when you view an object from different angles. For example, a wheel appears elliptical as we view it at an angle and a long straight road appears to merge at a distance.

Identify lights and shadows on your object: Study the basic tone, the dark tones, the darkest tones or shadows, and the lightest tones or highlights.

The last skill is the ability to use and practice all the above steps to enhance your skill and draw one final picture. Observe keenly and Practice these skills to draw realistically.

Cartoon Animal Drawings: Tips And Techniques

cartoon animal

Cartoon animals are easy to draw with some basic shapes. They are usually represented with large eyes and pupils when challenging characters are represented with a mix of two or three basic shapes.

Simple tips for cartoon animal drawings are listed below:

  • Large circular eyes located in the middle of the head: Eyes are drawn from the basic circle shape. To increase the level of cuteness, pupils are made large. Draw two small oval shapes inside the pupil to add more personality to a cartoon character.
  • The head is made from a circle that is not quite perfect: Draw circles as slightly rectangular or a rectangle that is not quite circular.
  • A large body filled with plain colors: Try to fill cartoon animal characters with plain and saturated colors.
  • Adding depth to character: Use a darker color for elements located behind the character. Also, draw some simple shadows if needed.

Follow these simple tips and draw beautiful cartoon animal characters.

Crayon Drawings: Simple Tips That You Need To Know

crayon drawings

Crayon drawings help us travel back to our childhood memories. Most of our drawing journey started with crayon drawings. Nevertheless, crayons are not just for kids, they can be used as a wonderful art medium.

Some simple techniques can be used to create beautiful arts and are listed below:

  • Use a paper that will grip the color evenly: Try Stonehenge or illustration board.
  • Have a good hand-held sharpener handy: Try to keep a point on the crayon.
  • Professionally apply the crayon: Use it as a fine art medium and use the control, not just as kids.
  • Build your colors gradually, and layer them: Start drawing with light colors. Give dark colors on top of the drawings.
  • Some colors are more transparent than others: Test your colors in a separate piece of paper to make sure they work properly. 
  • Too many layers of crayon can make the colors resist each other: Use a few colors to get better results. 
  • Scratch out small lines and details with a craft knife: It can give detailing to your drawing.

Practice these simple tips and draw beautiful crayon art works.

How To Create Your Own Mandala Drawing

Draw Mandala

Mandala is a complex abstract drawing made of geometric or abstract designs. Drawing and coloring Mandala is considered as an activity to connect with your soul. 

They are usually a part of spiritual practices all around the world. Mandala designing is also highly meditative. 

You can use a digital tool or an ordinary pencil and paper to draw a mandala.

To start drawing a full mandala, find the center point of your canvas, and lightly draw a cross through it to be used as a guide. 

Draw more lines (preferably eight in total) through the center to make drawing the mandala easier. Make markings at a distance of 1 cm from the center on all these guides. These markings will let you draw your designs proportionately on all sides.

Now unleash your creativity and draw whatever designs you please. Replicate the design on all sides using the guides as a reference line. Add color to your design to beautify your drawing and to relax even more. 

Start drawing mandalas to reduce stress and improve self-awareness. You will see that the designs you draw depend a lot on your mood and spirituality. 

5 Tips for charcoal drawing

charcoal drawing

Charcoal drawing is a technique which makes use of charred sticks to get a beautiful output. There are some tips with which you can improve your charcoal drawing and we are going to list them down below.

  • Find the essence: It is important to create the main idea or essence of drawing. The main idea is what the image is about, and what you want to say with it.
  • Learn the value of value: Value refers to the difference in light to dark shade on a range of one to ten.
  • Squint: Squint is the idea of simplifying your drawings. Squinting also helps to see simple shapes easily and add more essence to drawing.
  • Explore thick and thin lines: If every line is drawn with the same width it gives a monotonous look. The rule is to draw lines on top of things as thinner and underneath objects as thicker.
  • Use an eraser: Charcoal drawings are easy to control. Use an eraser to easily remove or erase what is not needed in your drawings.

Follow these simple tips and techniques for beautiful drawings.

5 Tips for drawing cloth folds and wrinkles

cloth folds and wrinkles

Clothing is hard to draw as it has a number of odd folds and wrinkles. It can take random shapes depending on the form on which it falls. So, a few factors are to be kept in your mind while drawing clothes.

The material of clothing: Thicker material and thinner materials results in lesser folds and more folds respectively. Stiff material clothing would have triangular folds, whereas softer material produces rounded folds.

Cut and fitting of clothing: Loose fitting clothes are influenced by gravity. Tight cut clothes, however, wrap around the form.

Movement of the subject: When in rest, the shape of drapes depends on gravity. But during motion, folds are influenced by the direction of the force and external factors like wind and rain.

Pulling point, or point of tension: Folds are mainly formed due to points of tension. These are mostly joints of the human body, like shoulders, elbows, knees among others.

Shadows and highlights: Depending on the direction of light and the type of material, the reflection of light varies. Smoother clothes have brighter highlights.

Follow the above steps to visualize the cloth folds and wrinkles in your imagination and give life to them.

How to create an illusion of depth in drawing

depth in drawing

A depth in drawing refers to the concept of making it look more dimensional and giving it a look of life. A lack of depth in drawing means it will be less than lifelike.

Some simple methods to create an illusion of depth in drawing are given below.

  • Volume: Drawing 3D objects shows more volume and indicates depth.
  • Size: Draw smaller objects farther away to create more depth in a painting.
  • Overlap: Draw images as one overlap over others to create more depth.
  • Position: Draw images as base positioned higher on the surface.
  • Edges: Draw foreground images with hard edges to give more focus. Draw background images with soft edges to look more blurry. 
  • Perspective: Draw images using linear perspective to give depth realistically.
  • Cast shadow: Draw cast shadows whenever necessary and adjust direction to the opposite side of a light source.
  • Horizon: Divide your drawing into the ground and sky by any medium like horizon line will give more depth.

Follow these simple methods and improve your drawing skills.